Technology has had a huge impact on my career as a musician. Effect pedals have allowed me to fine tune and enhance my music like never before.
After trying many effect pedals individually, I realized that I could combine pedals in a chain to create an even more complex tone. I had no idea where to start, but after experimenting for years, I now know how important the order is in creating the perfect sound.
To help you have an easier time, let’s take a look at how to set up a guitar pedal chain. In this tutorial, we’ll be talking about guitar pedal order.
What You Will Need for This Tutorial?
In order to set up a chain, you’ll need at least two, but preferably three pedals or more.
There’s really no limit to how many pedals you can connect to a chain, but it’s important to make sure every pedal serves a purpose and isn’t just taking up space on your pedalboard.
It will be up to you to choose what pedals you want to include, so let’s take a look at some different types.
1. Type or Guitar pedals
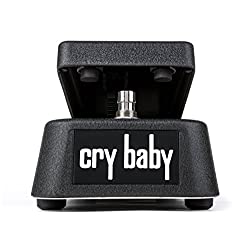
#1 Wah Pedals
Wah pedals are known for their ability to mimic the sound of a person saying “wah”. Many electric guitars have a wah-wah bar or stick, so you may already be familiar with the effect.
These pedals work well in rock, blues, and certain jazz genres because of the number of guitar solos in these genres.
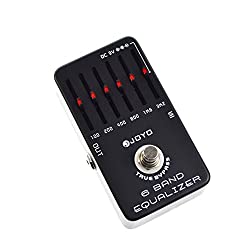
#2 EQ Pedals
Equalizer pedals have traditionally been used to boost audio signals for solos.
Although you can use a boost pedal for solos, EQ pedals will give you a tighter tone. These pedals are really a sub-type of boost pedals, since they equalize, which often results in boosting certain parts of your tone.
EQ pedals have become less popular as boost pedals have become more and more clean sounding over the years, but purchasing one will only help your overall tone.
Tom Morello from Rage Against the Machine is known for his use of EQ pedals, so if you want to create a similar sound, I’d recommend investing in one of these devices.
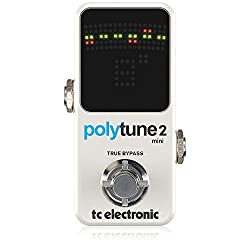
#3 Tuner Pedals
This pedal will do just what you’d expect it to do: tune your guitar. When you pluck a string, this pedal will tell you how much to raise or lower your pitch using a visual indicator.
The visual component makes these pedals great for performers who are on stage and need to tune quickly without being able to hear very clearly because of the loud environment.
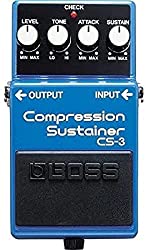
#4 Compressor Pedals
Compressor pedals will have a very subtle effect on your sound, but many musicians say that once they’ve used a compressor pedal once, they can’t go back to not incorporating one into their playing.
This is the most versatile kind of pedal, because musicians from any genre can benefit from it. Compressor pedals will balance out your audio signal by taking spikes in the signal and softening them.
This will create a more well-rounded, warm sound. Check out this article for the best compressor pedal.
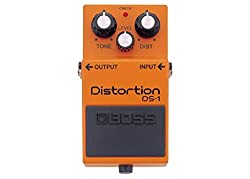
#5 Distortion Pedals
If I could associate a specific style of music with a distortion pedal, it would be vintage rock music from the 1960s.
Of course, distortion pedals can be used by any musician, regardless of whether they play in this style, but they create that crunch so characteristic of the classic rock style.
Distortion pedals will step things up a bit in terms of intensity from overdrive pedals. These pedals are all about increasing the gain to surpass a threshold, creating that rough crunch sound.
Since these pedals are more intense than overdrive pedals, they work really well in hard rock or metal genres.
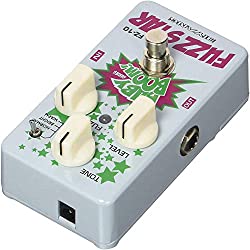
#6 Fuzz Pedals
Fuzz pedals are a type of distortion pedal, and they were originally created to mimic the tone of a saxophone. Today, fuzz effects are associated with guitar and are great for rock-based genres.
With fuzz pedals, you’ll most likely hear less of a clear sound than you will with distortion pedals, so ask yourself how intense you want your effect to be. If you like The Black Keys, a fuzz pedal might work great for your music.
For more information, check out this article on the best fuzz pedal.
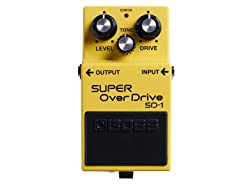
#7 Overdrive Pedals
These pedals are another type of distortion pedal and are designed to create an overdriven sound that reflects that of a classic rock amp turned up to its maximum settings.
These pedals are great for musicians who want their tone to have some extra presence, but not to the point of distortion. Artists such as John Mayer are known for their use of overdrive pedals.
These pedals are great for genres that don’t use intense crunch sounds, such as rock and pop-rock.
If you prefer John Mayer’s music to The White Stripes, you might want to invest in an overdrive rather than a distortion.
#8 Boost Pedals
Boost pedals will simply increase the volume of your sound, without giving you any of that unwanted buzzing that can come out of your amp at its maximum settings.
These pedals are great for any style of music or songs that involve putting the spotlight on the guitar in some way or another.
If you often play guitar solos in performances, you’ll probably benefit from this kind of pedal. Simply boost your signal during your solo and you’ll create a much more unforgettable sound.
You can read more about these pedals here.
#9 Modulation Pedals
Modulation pedals are really a group of pedals that achieve the same goals in different ways.
This group of pedals includes Chorus, Flanger, Tremolo, and any other pedal that modulates the amplitude, the frequency, or the phase.
The types of modulation pedals are broad enough that there isn’t really one genre that they work well in.
Make sure you do your research to find the right modulation pedal for you.
#10 Pitch Shifting Pedals
Modulation pedals also include pitch shifting pedals, which will create really obscure effects and are often given a category of their own.
These pedals, which include the Octaver, take your audio input’s pitches, and shift them to an amount that you’ll choose.
Pitch shifting pedals also often have a random shift setting, which will create the most obscure sounds because the effect won’t have the same sense of tonality.
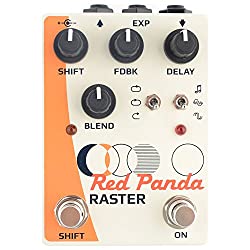
You can read about one of my favourite pitch shifter pedals, the Red Panda Raster, here.
#11 Delay Pedals
Delay pedals are some of my favourite pedals to use, so I’d recommend investing in one. These pedals will take your audio input and delay it to create an echo effect.
You’ll be able to choose how many repeats you want to hear, as well as how much time will pass between repeats.
You can also create out-of-the-box sounds with granular delay pedals, such as the Red Panda Particle.
This is a great pedal for almost all genres, but especially rock-based genres in the style of U2 or Coldplay.
For more on the best delay pedal, follow this link. You can also read more about analog delay pedals, which are great for achieving an authentic vintage tone, here.
#12 Reverb Pedals
Reverb pedals are all about creating an acoustic setting through technology.
With these pedals, you’ll have a variety of different settings to choose from, such as Cathedral, Room, Hall, Gated, and sometimes many more.
These are excellent pedals for musicians who want to perform in a large performance venue, but want to create an intimate, reverberant sound.
Check out this link to read more about the best reverb pedals.
For more information and some demonstrational videos on the different types of pedals, follow this link.
2. Must-have Gear
Now that you know the basics of each type of pedal, you’ll need to get your gear together. To complete this tutorial, you’ll need to have the following:
- A guitar (electric or acoustic with a pick up)
- A minimum of two pedals (but preferably as many as you can get your hands on)
- An amplifier
- Cords to connect your guitar to the pedals, the pedals to each other, and the pedals to the amplifier
3. Optional Gear
You can also benefit from using the following:
- Different guitars to experiment with different effects (electric guitars will sound better with distortion pedals)
- Guitar strap (so you can stand and press the footswitches)
- A pedalboard case (highly recommended, but not necessary)
Basic Principles
Like any skill, you’ll need to make sure you understand some basic rules of thumb. When you’re setting up your chain, remember:
#1 - Tuner Pedals need a Clean Signal
No matter what your final arrangement of pedals will be, if you actually want your guitar to be in tune, you’ll need to send a clean signal into the device.
If you send a distorted signal into a tuner, you’re not as likely to get an accurate reading on how out of tune your pitch is.
#2 - Volume before Modulation
Place pedals that increase your volume before pedals that will modulate the sound or affect the reverberance of your sound.
This also includes compressor pedals, even though these pedals are so often known for their softening of spikes in your signal.
Compressors will also raise certain tones that are disproportionately quiet, so make sure you place these pedals before your modulation effects. I always say: “Go into modulation with a clean tone.”
If you don’t increase the volume before you modulate, you might increase certain modulated effects and feel like your sound is out of your control.
#3 - Tone before Modulation
The same principle applies here: Go into modulation with a clean tone. This means, you’ll want to place tone producing pedals before tone modifying pedals.
Tone producing pedals include: compressor, tuner, wah, distortion, and overdrive pedals. If you don’t produce a clean tone before the modulation section of your chain, you’ll.
#4 - Pedals that Affect Reverberance go at the end of the Chain
If you followed the above principles, you would have ended up with your ambience pedals last anyway. However, it’s important to mention why these pedals go last.
When you’re playing around with delay and reverb pedals to create the impression of a certain setting, you’ll want to have an already perfect tone, and then ask yourself: “How do I want to present this tone to my audience?”
These principles will help you create an unforgettable tone.
Instructions
Different musicians have different opinions about the correct guitar pedal chain order.
Although I love the fact that there are no strict rules in music, there are general protocols many musicians follow when they’re creating pedal chains.
Let’s take a look at how to arrange guitar pedals in order.
Step 1: Tuner Pedals
Place your tuner pedal at the beginning of your chain. This will ensure you’re providing the rest of the effect pedals with an in-tune tone that will sound significantly better when altered than an out-of-tune tone.
Step 2: Filter & Compressor (Wah - Compressor - EQ)
#1 - Wah Pedals
Many musicians think that dynamic pedals (like compressors) should go first in the chain, but I usually put my wah pedal first. I can control the intensity of my wah sound by how I play my guitar.
If I use a strong attack on my guitar, I’ll get a more intense wah sound, and vice versa.
If the wah pedal is placed after a compressor pedal, then your ability to control that intensity with your guitar will be much more limited since the compressor will dampen the sound.
#2 - Compressor Pedals
After wah pedals, dynamic compressor pedals should be placed into the chain. This will set you up for success, because the signal being sent to distortion and modulation pedals will be nice and clean.
If you don’t balance out the audio before the other effect pedals, all the unwanted spikes in your signal might become emphasized through the distortion or modulation effects.
A general rule of thumb is that it’s always best to start out with the cleanest tone possible, and then play around with the effects.
#3 - EQ Pedals
I typically put my EQ pedals next in the chain. After you’ve balanced your tone with your compressor pedal, you can control the tone of your guitar by bringing out different frequencies.
If you want to drive up the middle frequencies on your guitar, and EQ pedal may do the trick.
This pedal is good for musicians playing on a lower quality instrument, since the tones on low end guitars don’t often stand out the way we want them to.
Many musicians don’t find compressors, boosters, and EQ pedals to be necessary in a chain, so make sure you do some research to figure out if this type will really benefit your chain.
Step 3: Gain Effects (Distortion - Overdrive - Fuzz)
#1 - Distortion
Next, you’ll need to plug in your distortion pedals. Distortion pedals come after filters and before modulation pedals because it’s best to distort a clean sound, and then modulate an already distorted sound to prevent the modulation effects from dominating the audio in an uncontrolled way.
If you put distortion pedals before filters, you’re likely to hear any spikes in your signal become even more emphasized.
#2 - Overdrive Pedals
Like I already mentioned, distortion and overdrive pedals complete similar functions. They both create a vintage rock sound by pushing the signal to surpass a threshold.
The difference is that distortion pedals will be more intense than overdrive.
Typically, this means musicians probably only need to choose one or the other. If you’re on a budget and want to build a chain, I would recommend choosing either a distortion or an overdrive pedal.
However, it would be a good idea to get your hands on both if you’re playing a setlist with two different songs that you know will use both effects.
If you put your overdrive after the distortion, you’ll hear less of a crunch effect than if you put the overdrive before the distortion.
#3 - Fuzz pedals
Next, incorporate your fuzz pedal to create a static, muffled guitar effect.
There are no strict rules about which distortion pedals come first in the distortion section of your chain, so try experimenting with different orders to find your preferred sound.
Step 4: Pitch Shifting Pedals
Although pitch shifting pedals are often groups in the modulation category, I like to place them before my chorus, flanger, or other modulators.
Octaver pedals are a type of pitch shifter that will allow you to create some great harmonies.
Even though pitch shifters modulate your pitch, they can still qualify as a tone producing pedal. If you refer to our third basic principle, you’ll remember that you should produce your tone before you modulate.
You’ll want to be happy with your tone before you start adding chorus effects that will just emphasize the previous effects.
Step 5: Modulation Pedals
Modulation pedals will come next in your pedalboard order setup. Like I already mentioned, “modulation pedals” is an umbrella term used to describe a group of different effect pedals.
This means you could incorporate a number of pedals into this step to create the sound you’re looking for.
It’s best to place the modulation pedals after the distortion pedals, because distortion pedals work best with a natural clean signal.
In terms of the order of each modulation pedal, that’s really up to you. I personally like to place chorus pedals before flanger pedals because chorus devices produce a more subtle effect.
Make sure you try out different orders of modulation pedals, and who knows, you might start a new sound effect trend by discovering the perfect order and settings for the modulation portion of your chain.
Step 6: Boost Pedals
Now that you’ve balanced, distorted, and modulated your guitar’s tone, you can incorporate volume or boost pedals.
It’s best to be happy with your overall sound before you boost it, because boost pedals will make everything you’re playing much more noticeable to your audience.
This is why these pedals work so well for guitar solos. Make sure you’ve fine tuned every other sound in your pedal chain, and then boost to your heart’s content.
Step 7: Time based effects (Delay & Reverb)
#1 - Delay pedals
Last, but certainly not least, are reverb pedals. These are my preferred pedals to use because I love creating an intimate reverberant space, even when I’m in a large performance hall.
In my opinion, it’s best to place these pedals last in the chain simply because of their function. Delay pedals will repeat your audio signal to you.
This means you’ll want to repeat a sound that has already been fine tuned using all your other pedals.
If you’re going to hear the audio delay over and over again, you’ll want to make sure you’re happy with the sound of that delay.
#2 - Reverb Pedals
After you’re happy with the amount of repeats you hear from your delay pedal, it’s time to create the setting.
There are many similarities between delay and reverb pedals, but reverbs are about imagining a space, rather than focusing on the echo alone.
For example, in Cathedral settings, you’ll hear a delay effect that engulfs the listener with sound. If you want to read more about reverb settings, check out this article.
What to Play on Each Pedal?
While some pedals are really versatile and can be played with any type of music, other pedals will sound great when used with certain styles of playing.
For example, feel free to play anything when using a compressor pedal.
Since this pedal doesn’t create a noticeable effect, you can use it for any style of music. This pedal will simply balance out your signal, and who can’t benefit from doing that?
Delay Pedals and Reverb Pedals
Delay pedals sound great in rock genres. The most notable band that incorporate a lot of delay effects are U2.
For this reason, songs in the style of U2 or U2 songs themselves will sound excellent with a delay pedal.
“I Still Haven’t Found What I’m Looking For” and “With or Without You” are two unforgettable songs that really require a delay pedal to produce the right effect.
If you’ve purchased a delay pedal and want to practice some delay-friendly passages, try playing an arpeggio on your favourite chord.
Since all the notes in the chord will work together harmonically, you’ll create a really pleasant sounding echo effect.
This is what U2 does in a lot of their music:
They play notes that will work well together and almost always create the feeling of being in a performance hall.
The same style of music will work well with reverb pedals too. Reverb pedals typically have similar settings, like Cathedral, Hall, and Room.
Like you might have guessed, the Cathedral setting will also work well for U2 songs.
If you’re deciding between the two, I’d recommend purchasing a reverb pedal over a delay if your main focus is creating the impression of a place or setting rather than focusing only on an echo.
Pink Floyd’s “Sorrow” has an intro that really takes advantage of the capabilities of a reverb pedal. This would be a great song to start with if you’re looking for some reverb-friendly repertoire.
Boost Pedals
Boost pedals also work well in rock genres, but also heavier rock genres like metal and punk.
Like I already mentioned, these pedals are really useful for solo guitarists, so I’d recommend you get your hands on one if you’re planning on taking the spotlight anytime soon.
If you want some ideas on where to start with your new boost pedal, try learning the notes to a solo by Jimi Hendrix.
Next, practice this solo without your boost pedal turned on, and continue to play it again immediately, but with the pedal turned on.
You’ll be able to hear the dramatic increase in presence you’ll get when you use a boost pedal.
You can also strum power chords with the pedal turned off, and then again with the pedal turned on.
For power chords, which many musicians typically want to sound heavy and dense, a boost pedal will give you that extra wow-factor.
Distortion Pedals
Distortion pedals are awesome for rough styles of music.
If you’re a fan of The Black Keys, you’ll probably benefit from purchasing a distortion pedal.
Their song, “Howlin’ for You” really depends on a distortion pedal to produce that memorable tone quality, so this would be a great song to start with if you really want to take advantage of your new pedal.
https://youtu.be/Y-k9VCDwHYA
Additionally, almost any song from the classic rock genre in the 1960’s, or more modern music inspired by the 1960’s, will work well with a distortion pedal.
These pedals are all about producing a vintage rock and roll effect, so Led Zeppelin, Pink Floyd, ACDC, and Guns N’ Roses will all have songs that sound great with a distortion pedal.
Modulation Pedals
Since modulation pedals are so broad, the styles of music that they work well in are also quite broad.
My preferred modulation pedal is a chorus pedal, and The Police have created some really great music that incorporates these effects.
Their song, “Walking on the Moon” is a great song if you’re trying to learn how to take advantage of your chorus pedal.
You could also use a flanger pedal for this song, just remember that the effect will be more intense.
If you’re more interested in using a flanger pedal than a chorus, “Keep Yourself Alive” by Queen is an excellent song to learn.
In a Chain
Now, you’re probably wondering what some great songs are to learn that incorporate not just one pedal, but a chain of pedals.
John Mayer is an excellent example of pedal chains done right. Mayer uses what seems like countless pedals during his performances.
Some of Mayer’s go-to pedals are the the Real McCoy Custom RMC8 pedal (wah pedal), the Electro-Harmonix Micro Synthesizer (fuzz pedal), the Ibanez TubeScreamer (overdrive pedal), and the Keeley Katana (boost pedal).
Alternative Ways of Setting up Your Chain
There’s always someone who breaks the mould when it comes to guitar.
In fact, introducing alternative ways of playing or setting up effect pedals is what starts new trends and often leads to the development of new genres.
That’s why, while it’s important to know the basics of pedal board setups, it’s also important to make some changes where you feel are necessary.
1. Wah after Overdrive
Although it’s common to put your wah pedal first in the chain, Jimi Hendrix is known for putting his wah pedal after the overdrive pedal in his chain.
When you adopt this order for your pedal chain, you’ll probably notice:
- An extremely noticeable and pronounced wah sound.
The emphasis of the wah effect works great for classic rock genres, the style of which has been largely influenced by Hendrix’s playing.
- Less control over your sound.
You might feel less in control of your sound when you put the wah pedal after your overdrive, but you’ll be more likely to create a Hendrix-like sound.
Since wah pedals respond to the amount of attack you use, putting at the beginning of your pedal and adjusting the intensity of your attack will allow you to control the effect.
By putting the wah pedal after the overdrive, you won’t be able to control the wah effect as easily, because it will already have been.
2. Modulation before Distortion
It’s typical to put your modulation effects after your distortion pedals. Like I mentioned, I always enter the modulation section of my pedal chain with a clean sound because I want to have a lot of control over the intensity.
However, other artists have used a different order than I prefer, and produced unforgettable music. Both Jimi Hendrix and Eddie Van Halen are known for putting their modulation pedals before their distortion pedals.
Doing so will emphasize your modulation effects, since distortion and overdrive pedals increase the volume. Consider what type of sound you want to create, and adjust your pedal order accordingly.
3. Boost Pedal first
I normally put my boost pedal right before my delay and reverb pedals, but you could also try placing the boost first at the beginning of the pedal chain.
This would be a great idea for musicians who are playing on lower quality guitars that don’t produce as loud of a sound.
Some guitarists like to place their boost pedal right after the compressor, because it will take the cleanest, most compressed sound possible, and then increase the volume to prepare it for other effects.
4. Effect Loops
You can also take advantage of the effect loop in your amplifier. This audio input/out loop comes after your preamp but before your power amp.
Effects loops will be included on most large amps, but if you’re thinking of purchasing a new amp, keep in mind that really small amplifiers will be less likely to have this feature.
Originally, amps didn’t have an effect loop feature and musicians had to send their effects directly to the front of the amp.
They noted, however, that modulation, delay, and reverb pedals sound best when they’re affecting an already overdriven tone.
Using an effect loop will allow you to overdrive your tone with your amplifier and then send that overdriven tone to your modulation and delay pedals.
Technology has progressed, so amplifiers are now designed to accommodate effect loops but be sure to do some research before your purchase.
If you have an overdrive pedal, effect loops probably won’t be something you’ll spend a lot of time on.
Here are the types of effect loops on amplifiers:
- Series: These effects loops will send your whole signal through the loop. This is probably the most common way to use an effect loop on your amplifier.
- Parallel: These effect loops will split your signal. Part of your signal will go through the loop, and part of your signal will just go straight out the amplifier. Some musicians prefer parallel loops because the original tone is more present than when using a series loop.
- Tube/Solid State Driven Loops: These loops will set the send level and the return gain level to create a balanced sound.
- Buffer: This type of loop will probably be automatic with your amplifier as it balances out the low frequencies to create a well-rounded tone.
Tips from the Pros
While I learned a lot of what I know about pedals from experimenting on my own, I’ve also received a lot of invaluable advice from experts in the guitar world.
If you’re just getting started, remember to:
Consider the size of the Pedals you’re Buying
Ask yourself what kind of effect pedal musician you plan on being. If you plan on using a lot of effect pedals, you might want to do some research on devices that are small in size.
When I was first learning about pedals, I mistakenly thought the bigger the better.
Thankfully, an experienced musician gave me some great advice during my search for pedals.
While it’s true that bigger pedals are often more powerful and have more storage space, bigger is not better if you plan on creating a really complex arrangement of pedals.
Smaller pedals will take up less space on your board, giving you more room for effects.
Don’t “Cheat”
John Mayer is known for his remarkable guitar playing abilities. He’s also known for being a master of guitar pedals, and will often use more than ten when he’s on stage.
Mayer uses a lot of overdrive effects in his music, and has pointed out the importance of avoiding turning the overdrive knob up to high.
Many musicians tend to turn their overdrive settings up all the way, but Mayer says the overdrive knob is like a cheat knob, and if you cheat too much, you’ll lose the quality of your sound.
Instead, take advantage of your volume knob to find the right balance between overdrive effects and the level.
Use Robert Keeley’s Acronym to Help you Memorize the Order
Robert Keeley, the designer of the Keeley Compressor Pedal, has come up with a great saying that will help you memorize what pedal goes where in the chain.
Which chain of effects pedals makes life easy?
The first letter of each word corresponds with the first level of each type of effect pedal.
Which corresponds with wah, chain with compressor, or with overdrive, effects with EQ, pedals with pitch, makes with modulation, life with levels, and easy with echo.
So many of us want to be “the next Jimi Hendrix” but we fail to remember that being the next big guitarist requires us to be different than past guitar gurus.
When Jimi Hendrix came into the spotlight, he was praised for his uniqueness.
Being different is what made him stand out, so you should try to experiment with new arrangements on your pedalboard to establish yourself as a creative thinker.
Joe Augello, who has worked with notable artists like Jennifer Hudson and The Backstreet Boys, has explained:
“A common thing I see is that a lot of players are always trying to chase someone else’s sound.
Getting a Univibe and a Fuzz Face because Jimi Hendrix used them isn’t going to make you sound like him. Guys like Jimi and Eddie Van Halen were innovators and always experimented with their gear. They weren’t using what everyone else was using at that time.”
It’s important not chase the ideas of other guitarists, but establish and develop your own ideas.
Short Patch Cables!
One worry a lot of guitarists, including myself, has faced is whether cables will decrease the sound quality of their music.
An experienced guitarist once told me to invest in high quality, short patch cables.
The shorter the cable, the less your sound will be degraded. When I tested out the difference between long and short patch cables, I was amazed at how much more crisp and clear my sound was.
Famous Guitarist’s PedalBoards
1. John Mayer
One of the best guitarists to use as an example for creating the perfect guitar chain is John Mayer.
John Mayer started his music career in the 1990’s and has exploded in popularity since.
He’s known for his use of effect pedals, and is truly a master when it comes to creating an unforgettable sound.
John Mayer’s pedalboard is complex, and often incorporates fifteen or more pedals. Using fifteen pedals means you’ll hear a really complex sound that you can fine tune to suit your preferences.
However, a pedalboard this large is also extremely expensive, and many musicians might not be prepared to spend this much.
John Mayer’s pedalboard is changing all the time, but in 2016, it started with an acoustic tuner.
This is common because tuner pedals at the beginning will ensure you’re affecting a clean and accurate sound. Next, Mayer has a Keeley Katana boost pedal.
Although I normally put my boost pedal at the end of my chain before the delay and reverb pedals, putting your boost pedal at the beginning is a common alternative that will send a louder signal to the distortion section.
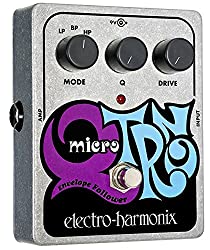
Next, Mayer uses an Electro-Harmonix Q-Tron envelope follower with effects loop. This pedal provides auto-wah effects, which are really common in Mayer’s music.
The Q-Tron will also act as a boost system, which shows you how much Mayer values boost effects in his sound.
Next is the Strymon OB.1 Optical Compressor and Clean Boost pedal, which will provide you with 20dB gain-compensated compression.
Mayer also uses the Boss Super Octave OC-3 pedal, which is then connected to the MXR Phase-90 pedal.
The Ibanez TubeScreamer comes next, which really increases the presence of those modulation effects.
Mayer then enters the delay/reverb section with the Aqua-Puss Analog Delay pedal, followed by the Strymon Flint Tremolo and Reverb pedal.
As you can probably see, Mayer’s pedalboard focuses a lot on boost and overdrive sound effects.
This is why he has numerous pedals that create similar effects, like the Q-Tron and the Strymon OB.1.
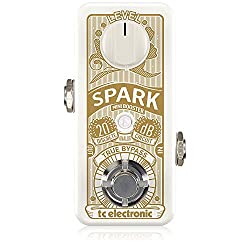
If you aren’t prepared to invest in all of these pedals, try purchasing a singular powerful boost pedal, like the TC Electronic Spark Booster.
Pros
- Complex sound
- Lots of boost
Cons
- Very expensive board
- May be too complex for beginners
If you want to read more about Mayer’s pedalboard, take a look at this article.
2. James Valentine (Maroon 5)
James Valentine plays with the popular band Maroon 5. This band has won three Grammy awards, so it’s no surprise that James Valentine has an excellent pedalboard setup.
This arrangement “breaks the rules” quite a bit, but will hopefully help you realize that you can still obtain an impressive sound even when pedals aren’t in a traditional order.
Valentine starts his board with the Keeley Looper pedal, which is popular among musicians from all genres. The looper is then connected Providence Anadime Chorus pedal.
Typically, you’d see a chorus pedal later on in the chain, but this pedal is right near the beginning.
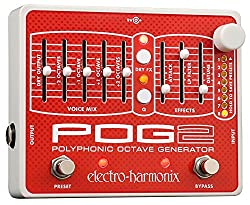
Next, the Electro-Harmonix Micro POG 2, which is a polyphonic octave generator, will allow you to build texture like you wouldn’t believe.
The Keeley Katana Clean Boost pedal, which you might recognize from John Mayer’s board, comes next and provides extra presence.
Next in the board is the first distortion pedal we’ve seen: the Fulltone Octafuzz pedal, followed by the ZVex Octane 3 pedal for some extra fuzz effects.
Valentine’s wah pedal, which is normally seen near the beginning of a chain, comes next with the Dunlop Wylde Signature Wah.
The chain continues with a Fulltone Fulldrive 2 pedal, followed by the Fulltone OCD pedal.
The OCD seems to be Valentine’s preferred overdrive pedal and he uses it most frequently. The overdrive pedals continue with a Menatone Blue Collar Overdrive.
Next in the chain, a Boss NS-2 Noise Suppressor, which will help to get rid of unwanted buzzing or hums in your signal.
The Axess BS-2 Buffer/Splitter, which is excellent for creating a well rounded tone, comes next in the setup.
Next is the Dunlop Rotovibe, which Valentine himself says produces his “favorite swirly-type of effect”.
The Boss FV-500H volume pedal, which you’ll see again in Keith Urban’s setup below, follows to give the signal more presence.
Finally, the chain ends with a Keeley-Modded Line 6 DL4 pedal, which will allow musicians to fine-tune their tone.
Pros
- Unique sound
- Good presence with overdrive pedals
Cons
- Less logical than other arrangements (difficult to remember)
- Keeley-Modded Line 6 DL4 is hard to find
3. Keith Urban
Keith Urban’s pedal rack is great for all things country.
This Grammy award-winning country artist from New Zealand is renowned for his guitar skills.
This pedalboard follows a lot of the rules of thumb already mentioned, starting with the Demeter Comp-1 Compulator and the Wampler Ego compressor pedal.
The Analog Man Juicer, yet another compressor pedal, comes next.
This demonstrates that if you want to build a complex board, you can mix numerous pedals of the same type to achieve the perfect sound.
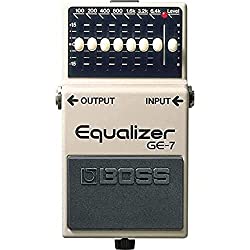
Next, the Wampler Paisley Drive brings the volume up and is followed by not one, but two Boss GE-7 Graphic EQ pedals.
Urban is all about doubling up pedals he enjoys if he thinks it will improve the sound.
Keith then enters the distortion portion of his chain, which involves the MXR Distortion-III and the T-Rex Alberta Overdrive pedal.
Urban then uses a B.K. Butler Tube Driver pedal, which will increase his presence even more, followed by two Klon Centaur pedals.
Next, Urban has a Pro Co Rat distortion pedal set up, an MXR GT-OD overdrive pedal set up, an XTS Custom Pedals Precision overdrive pedal, followed by a modulation pedal: the Boss CE-2 Chorus.
Urban’s arrangement then makes its way onto the floor instead of a rack. The floor setup begins with a Custom Audio Electronics RS-10 Foot Controller as well as an RS-10 Expander Module which will allow you to create loops.
The Boss FV-500H, an excellent volume pedal, comes next in the chain followed by an Ernie Ball volume pedal.
Last but not least is the Boss FS-5U which allows Keith Urban to engage and disengage settings.
Pros
- Logical order
- Great presence with overdrive pedals
Cons
- Same pedals beside each other might feel redundant
- Involves a rack
Frequently Asked Questions
A lot of musicians ask me similar questions about effect pedal chains, so I’ve provided some of them here to help you out:
1. Why do Guitarists Use Guitar Pedal Boxes more than Processors?
Guitar pedals are designed to be user-friendly, so they tend to have controls and features that are easy to understand.
Also, you’ve probably now realized that pedal chains will open up a world of endless possibilities in terms of the effects you can create.
Many musicians use pedals instead of guitar processors because it gives them more creative.
2. Should I get a new Amplifier or a new Effects Pedal?
Unfortunately, a great pedal won’t cancel out an amp’s poor quality. You can invest in all the high end pedals you want, but if your amp isn’t built to create a high quality sound, you’ll probably be disappointed with the output signal.
This also goes for instruments. Even if you have the best guitar on the market, you won’t necessarily hear its capabilities if you’re using a less than impressive amp.
This is why I’d recommend purchasing a new amplifier if you feel yours is below average.
3. How does the Arrangement of Effect Pedals Affect the Output Sound?
I’ve already covered a lot of this question in the above section, but it’s important to understand the basic principles.
In a nutshell, you need to think of your pedal chain as a building that needs a solid foundation to stand tall and not topple over.
Your pedal chain should be built from the ground up, so you’ll want to start with a nice clean foundation, rather than distorting the sound right away.
If you put your fuzz pedal before your compressor pedal, your compressor will essentially balance out and reduce the effect of your fuzz.
It’s better to send a clean signal into the fuzz pedal first so that the end product isn’t a bunch of distorted and disjunct sounds.
Similarly, imagine you put your boost pedal before the distortion pedal with no compressor pedal in the chain.
You’re going to hear all those spikes in your signal that the compressor would normally get rid of as much more dramatic.
You’re essentially boosting those already loud spikes. Then, the distortion pedal will just further emphasize and draw attention to those spikes.
Of course there’s room for experimentation, and you should follow your own tastes, but these are the general rules of thumb for pedal chains.
4. Can I Chain two Guitar Pedals for a Live Performance?
Yes, of course! Anything you tried in this tutorial can be taken to a live stage. Just remember to practice and memorize your different settings really thoroughly.
When you factor in the nervousness of being on stage, your setup and playing may go quite differently than it did in your practice sessions. Be prepared, and you’ll put on a performance to remember.
5. Should I Purchase a Pedalboard or a Pedal Rack?
In my opinion, I would say a pedalboard because I like the simplicity of them and I don’t tend to use more than five pedals when I’m performing.
If you’re a visual person like I am, it’s really helpful to be able to see all of the pedals and how they connect to one another on the board.
On a rack, you won’t have this visual component, as your pedals will be more tucked away.
Racks are helpful for musicians who need to adjust settings on their pedals but don’t want to bend down during a performance.
Racks are also more expensive that pedalboards are, so you’re more likely to get a high quality product when you purchase one.
In my opinion, musicians who use a significant number of pedals when they’re performing can benefit from both a pedalboard and a rack.
Pedals that need hands-on adjustments during a performance can stay on the rack, while pedals that you want to turn on and off using the footswitch can stay on a board at the front.
6. Can I Still Create a Chain Without a Pedalboard?
Of course you can! Pedalboards are a great way to organize your pedals into one unit.
They help musicians see where each pedal is and what it’s connected to very easily, which is useful when you’re on stage.
However, you don’t need a pedalboard to create a chain. You can simply organize your pedals on the floor in front of you.
Although I’d recommend purchasing a pedalboard, if you have to make a decision between investing in a new pedal or a pedalboard, I’d recommend going with the effect pedal.
If you’re a handy person, you could even create your own pedalboard using wooden blocks.
7. Will using a Y Connector Affect my Signal in a Negative Way?
Y connectors are ways to split the signal and send it to two different output devices (amplifiers).
You might hear a slight degradation in the sound quality when you split the signal like this, but many artists do it to create a more manageable set up for their performances.
If you purchase a high quality splitter, you probably won’t be able to notice a drastic difference in your sound quality.
If you’re worried about the degradation of your sound, I’d recommend researching the BOSS effects processors.
These FX processors can often produce over one hundred effects on a single device, so you won’t need to set up a chain of different devices and split the signal.
You can read more about the BOSS GT-1 effects processor on their website.
8. What is a Good Pedal order for Blues/Rock Music?
If you’re a blues or rock musician, follow the order of pedals I provided above.
This order is pretty universal and has been adopted by musicians in almost any genre which is why this instructional guide is for every musician.
The important thing for blues or rock music isn’t the order of the pedals, but the types of pedals that your choose to use and the riffs you play with them.
For example, hard rock genres probably won’t involve Cathedral settings on a reverb pedal too often.
Rather, musicians who play in this style will take advantage of heavier distortion effects. Do some research on what pedals your guitar idols use and you’ll be that much closer to developing a signature sound that works for you.
Conclusion
Hopefully you found this tutorial on the correct guitar effects chain order helpful.
Effect pedals are a great way to make your music more unique and unforgettable.
When I discovered I could combine effect pedals, my musical career changed forever.
Creating a chain of effect pedals will allow you to fine tune your sound and experiment with countless effects simultaneously.
Make sure you set up your pedal chain in an order that works for you.
Generally, the compressor pedal will go near the beginning, followed by distortion, overdrive, modulation, delay, and reverb pedals.
Once you get familiar with the pedals, you can switch up your order. Maybe you’ll start a new trend in the pedal world.

